Bundle Splitting
Currently, the production version of the application is a single JavaScript file. If the application is changed, the client must download vendor dependencies as well.
It would be better to download only the changed portion. If the vendor dependencies change, then the client should fetch only the vendor dependencies. The same goes for actual application code. Bundle splitting can be achieved using optimization.splitChunks.cacheGroups. When running in production mode, webpack 4 can perform a series of splits out of the box but in this case, we'll do something manually.
To invalidate the bundles correctly, you have to attach hashes to the generated bundles as discussed in the Adding Hashes to Filenames chapter.
The Idea of Bundle Splitting
With bundle splitting, you can push the vendor dependencies to a bundle of their own and benefit from client level caching. The process can be done in such a way that the whole size of the application remains the same. Given there are more requests to perform, there's a slight overhead. But the benefit of caching makes up for this cost.
To give you a quick example, instead of having main.js (100 kB), you could end up with main.js (10 kB) and vendor.js (90 kB). Now changes made to the application are cheap for the clients that have already used the application earlier.
Caching comes with its problems. One of those is cache invalidation. A potential approach related to that is discussed in the Adding Hashes to Filenames chapter.
Bundle splitting isn't the only way out. The Code Splitting chapter discusses another, more granular way.
Adding Something to Split
Given there's not much to split into the vendor bundle yet, you should add something there. Add React to the project first:
npm install react react-dom --save
Then make the project depend on it:
src/index.js
leanpub-start-insert
import "react";
import "react-dom";
leanpub-end-insert
...
Execute npm run build to get a baseline build. You should end up with something as below:
Hash: 80f9bb6fc04c54949644
Version: webpack 4.1.1
Time: 3276ms
Built at: 3/16/2018 4:59:25 PM
       Asset       Size  Chunks             Chunk Names
leanpub-start-insert
     main.js   97.5 KiB       0  [emitted]  main
leanpub-end-insert
    main.css   3.49 KiB       0  [emitted]  main
 main.js.map    240 KiB       0  [emitted]  main
main.css.map   85 bytes       0  [emitted]  main
  index.html  220 bytes          [emitted]
Entrypoint main = main.js main.css main.js.map main.css.map
...
As you can see, main.js is big. That is something to fix next.
Setting Up a vendor Bundle
Before webpack 4, there used to be CommonsChunkPlugin for managing bundle splitting. The plugin has been replaced with automation and configuration. To extract a vendor bundle from the node_modules directory, adjust the code as follows:
webpack.config.js
const productionConfig = merge([
  ...
leanpub-start-insert
  {
    optimization: {
      splitChunks: {
        chunks: "initial",
      },
    },
  },
leanpub-end-insert
]);
If you try to generate a build now (npm run build), you should see something along this:
Hash: 6c499f10237fdbb07378
Version: webpack 4.1.1
Time: 3172ms
Built at: 3/16/2018 5:00:03 PM
               Asset       Size  Chunks             Chunk Names
leanpub-start-insert
     vendors~main.js   96.8 KiB       0  [emitted]  vendors~main
leanpub-end-insert
             main.js   1.35 KiB       1  [emitted]  main
            main.css   1.27 KiB       1  [emitted]  main
leanpub-start-insert
    vendors~main.css   2.27 KiB       0  [emitted]  vendors~main
 vendors~main.js.map    235 KiB       0  [emitted]  vendors~main
vendors~main.css.map   93 bytes       0  [emitted]  vendors~main
leanpub-end-insert
         main.js.map   7.11 KiB       1  [emitted]  main
        main.css.map   85 bytes       1  [emitted]  main
          index.html  329 bytes          [emitted]
Entrypoint main = vendors~main.js vendors~main.css ...
...
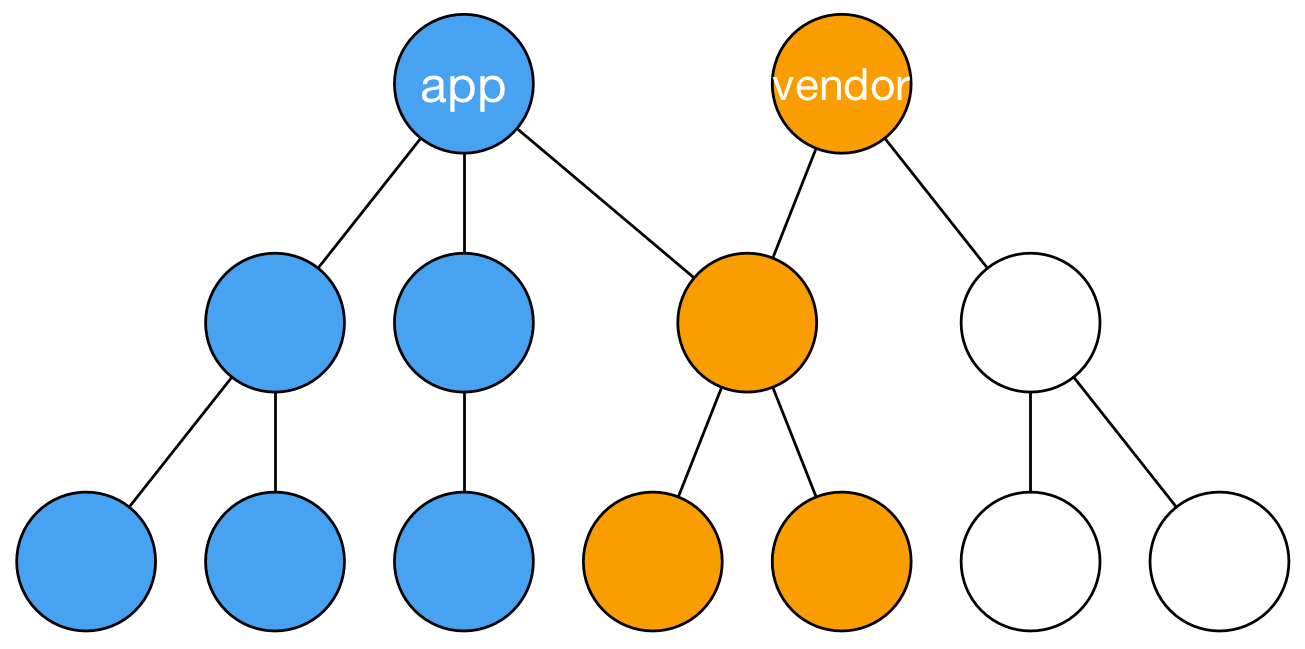
Now the bundles look the way they should. The image below illustrates the current situation.
Controlling Bundle Splitting
The configuration above can be rewritten with an explicit test against node_modules as below:
webpack.config.js
const productionConfig = merge([
  ...
leanpub-start-insert
  {
    optimization: {
      splitChunks: {
        cacheGroups: {
          commons: {
            test: /[\\/]node_modules[\\/]/,
            name: "vendor",
            chunks: "initial",
          },
        },
      },
    },
  },
leanpub-end-insert
]);
Following this format gives you more control over the splitting process if you don't prefer to rely on automation.
Splitting and Merging Chunks
Webpack provides more control over the generated chunks by two plugins: AggressiveSplittingPlugin and AggressiveMergingPlugin. The former allows you to emit more and smaller bundles. The behavior is handy with HTTP/2 due to the way the new standard works.
Here's the basic idea of aggressive splitting:
{
  plugins: [
    new webpack.optimize.AggressiveSplittingPlugin({
        minSize: 10000,
        maxSize: 30000,
    }),
  ],
},
There's a trade-off as you lose out in caching if you split to multiple small bundles. You also get request overhead in HTTP/1 environment. For now, the approach doesn't work when HtmlWebpackPlugin is enabled due to a bug in the plugin.
The aggressive merging plugin works the opposite way and allows you to combine small bundles into bigger ones:
{
  plugins: [
    new AggressiveMergingPlugin({
        minSizeReduce: 2,
        moveToParents: true,
    }),
  ],
},
It's possible to get good caching behavior with these plugins if a webpack records are used. The idea is discussed in detail in the Adding Hashes to Filenames chapter.
webpack.optimize contains LimitChunkCountPlugin and MinChunkSizePlugin which give further control over chunk size.
Tobias Koppers discusses aggressive merging in detail at the official blog of webpack.
Chunk Types in Webpack
In the example above, you used different types of webpack chunks. Webpack treats chunks in three types:
- Entry chunks - Entry chunks contain webpack runtime and modules it then loads.
- Normal chunks - Normal chunks don't contain webpack runtime. Instead, these can be loaded dynamically while the application is running. A suitable wrapper (JSONP for example) is generated for these. You generate a normal chunk in the next chapter as you set up code splitting.
- Initial chunks - Initial chunks are normal chunks that count towards initial loading time of the application. As a user, you don't have to care about these. It's the split between entry chunks and normal chunks that is important.
Conclusion
The situation is better now compared to the earlier. Note how small main bundle compared to the vendor bundle. To benefit from this split, you set up caching in the next part of this book in the Adding Hashes to Filenames chapter.
To recap:
- Webpack allows you to split bundles from configuration entries through the
optimization.splitChunks.cacheGroupsfield. It performs bundle splitting by default in production mode as well. - A vendor bundle contains the third party code of your project. The vendor dependencies can be detected by inspecting where the modules are imported.
- Webpack offers more control over chunking through specific plugins, such as
AggressiveSplittingPluginandAggressiveMergingPlugin. Mainly the splitting plugin can be handy in HTTP/2 oriented setups. - Internally webpack relies on three chunk types: entry, normal, and initial chunks.
In the next chapter, you'll learn about code splitting and loading code on demand.